How to install Xfce Desktop in minimal installed CentOS 6.x
In this tutorial we will learn,how to install Xfce Desktop in minimal installed CentOS 6.x.We have done this practical in CentOS 6.5 . Xfce is a lightweight Desktop environment.In our last post we have installed Xfce in Ubuntu.
To install Xfce in minimal installed CentOS 6.x,follow the given below steps
Note: Minimal install CentOS runs in runlevel 3
Step 1: Download and installEPEL repo as per the CentOS architecture
In 64 bit CentOS (x86_64)
# wget http://download.fedoraproject.org/pub/epel/6/x86_64/epel-release-6-8.noarch.rpm
# rpm -ivh epel-release-6-8.noarch.rpm
In 32 bit CentOS (i386)
# wget http://download.fedoraproject.org/pub/epel/6/i386/epel-release-6-8.noarch.rpm
# rpm -ivh epel-release-6-8.noarch.rpm
Step 2: Install Xfce and fonts
# yum groupinstall Xfce
Just wait. Fonts installation is left. Without Fonts it appear like this.
Installing Fonts
# yum groupinstall Fonts
# yum install xorg-x11-fonts-Type1 xorg-x11-fonts-misc
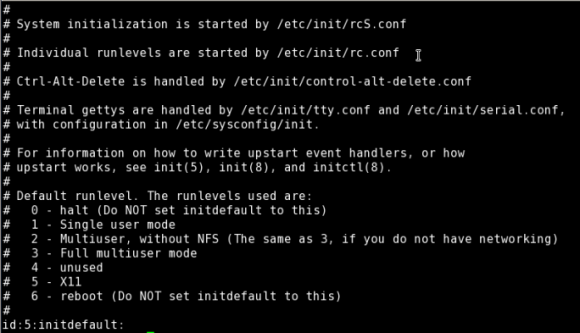
Step 3: Now change to runlevel 5 by editing the file /etc/inittab.
Search the runlevel line.Replace id:3:initdefault: to id:5:initdefault:
Step 4: Restart the system .Run the below given command
init 6
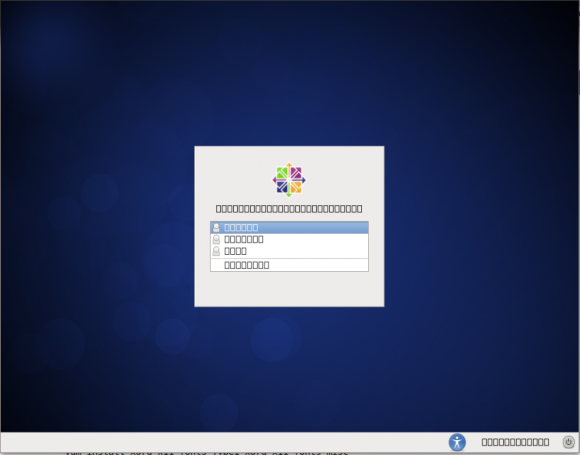
On login screen,give user name & passwd.
For temporary method to login:
Change to runlevel 5 without reboot,run below command
/sbin/telinit 5
Or without using telinit command,you can also run the command directly from the current terminal.
#startxfce4
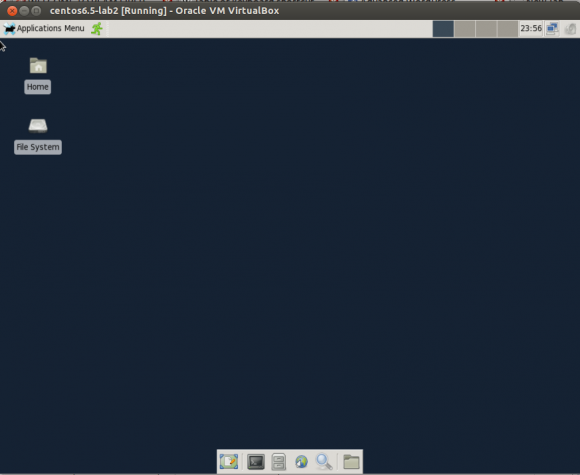
Most probably you will get the Desktop like this after login
原文链接:How to install Xfce Desktop in minimal installed CentOS 6.x,转载请注明来源!